


 My unit on food has come to an end (though I still have a ton of ideas); now I am moving on, and yesterday we made these simple flowers. My kids loved this project!
All you need is a cupcake liner, some construction paper, a cottonball, glue, and some perfume. Cut out a stem and some leaves from green construction paper. Have the kids glue them on the page. Then flatten a cupcake liner a bit and glue that on as the flower. A cottonball gets glued in the middle of the cupcake liner. Then spray some perfume on the cottonball and let everything dry. There you have it--simple, quick, and oh so fragrant!

 I hung these low on our playroom wall that my kids could enjoy them whenever they had the inclination. What a great sensory activity! Try it with your kids!
 To make the Popsicle stick hearts, simply cut the ends of a Popsicle stick or tongue depressor off at an angle using a strong pair of nippers, and glue them together to make hearts. I had mine color them with markers, but you could also paint them. Here are some pics:


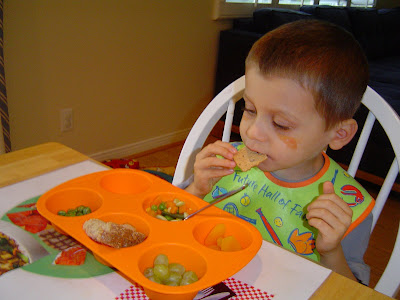


 The morning we planned to do this project, I had my 3 year old sort the food items into their food groups. He did surprisingly well, and even dumped them out after sorting them once and sorted them again! I don't think he realized he was learning! ;) There's no real reason to sort the food if your toddler is too little to do that. I just thought it'd be a fun activity for my preschooler.
 This is a great activity to work on verbal skills with your kids. It's also interesting to see what foods they choose. You can ask them to name the foods or to tell you why they picked what they picked. You can extend it to talking about sweet and salty foods, the food groups, etc. And since it can become a permanent fixture at your dinner table, the learning can extend much longer than the 15 mintues it takes to put the mats together. I hope you like this one!


 Besides being cute, what I liked about this project was that it required my little ones to follow directions, pay attention to detail and color, and work with a glue pen and the fine kernels of rice.
 To do this project, you will need colored rice (see my posts under "fun with foods" for instructions on dying rice), a piece of construction paper and glue--I used a glue pen. Have your child draw (or draw it yourself) an arch with the glue. Then have them add red rice as you would add glitter, to the arch. Repeat, varying the colors until you have a completed rainbow. You can use this activity to talk about the letter "R" because both rice and rainbow begin with R.

 An activity like this is a wonderful learning tool to help teach a child about cause and effect, and it develops manual dexterity. My children both had a great time with this activity, especially my 2 year old. She kept at it for 30 minutes or so, and I know she'll be asking to do this one over and over. I hope your little ones enjoy this as much as mine did!


